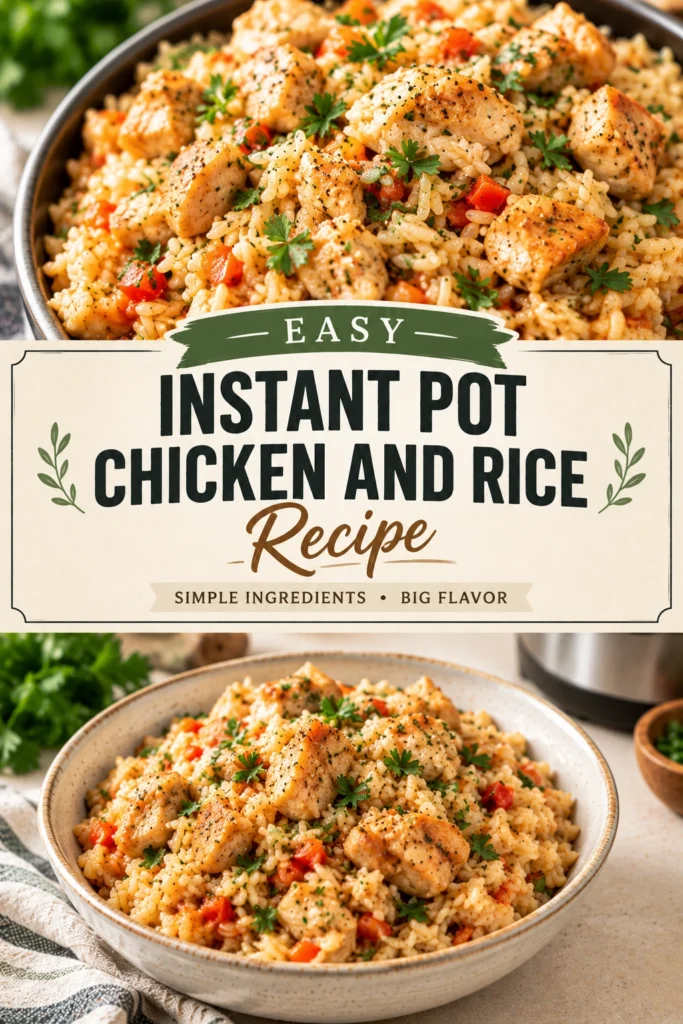
The scent of garlic and simmering chicken broth filling the kitchen is the first sign that a comforting meal is nearly ready.
This recipe combines tender chicken breasts and long-grain white rice into a single pot, using pressure to lock in moisture.
Home cooks appreciate this dish because it removes the need to monitor multiple pots on the stove.
Unlike traditional stovetop methods where rice can easily burn or dry out, the sealed environment of the pressure cooker creates a uniform texture.
It is a practical solution for anyone who needs a balanced protein and starch meal without spending an hour at the counter.
The following guide details how to achieve the perfect rice-to-liquid ratio for a fluffy result.
- ●Why You’ll Love This Recipe
- ●A Brief Background on One-Pot Cooking
- ●Perfect For Busy Weeknights and Meal Prep
- ●Chicken Ingredient Spotlight
- ●Rice Ingredient Spotlight
- ●Key Ingredients
- ●How to Make It
- ●Pro Tips
- ●Delicious Variations
- ●Best Ways to Serve
- ●Storage and Leftovers
- ●Frequently Asked Questions
- ●Why This Recipe Belongs in Your Weekly Rotation
- ●Final Thoughts
This meal streamlines the dinner process searing and simmering in one vessel.
- ●Minimal cleanup since only one pot is used.
- ●Faster cooking time compared to oven-baked chicken and rice.
- ●Tender chicken that does not dry out under pressure.
- ●Rice that absorbs all the savory chicken juices.
- ●Easily customizable with different herbs or vegetables.
- ●Budget-friendly ingredients found in any grocery store.
- ●Consistent results every time you use the pressure setting.
- ●Balanced nutrition with protein and carbohydrates in one dish.
It is a reliable staple that satisfies hunger without requiring complex culinary skills.
A Brief Background on One-Pot Cooking |
One-pot meals have evolved from simple stews to sophisticated pressure-cooker recipes. The primary goal is to allow flavors to meld together during the cooking process rather than preparing components separately.
Using a pressure cooker changes how the rice interacts with the liquid. The high-pressure steam penetrates the grains quickly, which helps them cook evenly without the bottom layer becoming mushy.
This approach is similar to how the Savor The Flavorful Golden Arabic Chicken And Rice balances spices and grains for a cohesive taste.
Ultimately, this method prioritizes efficiency and flavor integration.
Perfect For Busy Weeknights and Meal Prep |
When the workday ends and time is limited, a recipe that requires minimal active supervision is essential. This dish allows you to prep the ingredients and let the machine do the work while you handle other tasks.
For those who meal prep on Sundays, this recipe scales well. The rice holds its structure when refrigerated, making it a stable base for lunches throughout the week.
Family dinners become less stressful when the main course and side dish are cooked together. It provides a neutral, satisfying flavor profile that appeals to both children and adults.
Chicken Ingredient Spotlight |
Chicken breast provides a lean, high-protein foundation that pairs well with the neutral flavor of white rice. Because it is a denser meat, it benefits from the rapid pressure cooking which prevents the exterior from toughening while the interior reaches the safe temperature.
Rice Ingredient Spotlight |
Long-grain white rice is the ideal choice here because of its ability to remain distinct and fluffy. If you use a short-grain variety, the dish may become too sticky or porridge-like due to the high moisture content of the pressure cooker.
Key Ingredients |
These components work together to create a savory, well-rounded meal.
- ●Chicken Breast — Provides the primary protein and creates a rich base for the rice.
- ●Long-Grain White Rice — Acts as the absorbent starch that carries the flavor of the broth.
- ●Chicken Broth — Adds depth and salinity compared to using plain water.
- ●Garlic — Introduces a pungent, aromatic layer that enhances the savory notes.
- ●Onion — Adds a subtle sweetness and complexity to the liquid.
- ●Olive Oil — Used for searing the chicken to develop a golden crust.
- ●Salt and Pepper — Essential for seasoning the meat and balancing the overall taste.
How to Make It |
Follow these steps to ensure the chicken is juicy and the rice is perfectly tender.
- Sear the chicken: Set the Instant Pot to the Sauté function. Add olive oil and brown the chicken breasts for 3-4 minutes per side until a golden crust forms. This step develops a deeper flavor that boiling alone cannot provide.
- Sauté the aromatics: Remove the chicken and add diced onions and minced garlic to the pot. Stir for 2 minutes until the onions become translucent and the garlic smells fragrant, taking care not to burn the garlic.
- Deglaze the pot: Pour in a small amount of chicken broth and scrape the bottom of the pot with a wooden spoon. This removes the browned bits of chicken, known as fond, which prevents the “Burn” error message during the pressure cycle.
- Layer the ingredients: Stir in the rinsed rice, ensuring the grains are spread evenly across the bottom. Pour in the remaining chicken broth and stir gently to combine the rice and liquids, then place the seared chicken breasts on top of the rice.
- Pressure cook: Lock the lid and set the valve to the sealing position. Select Manual or Pressure Cook on High for 8 minutes. This timing allows the rice to absorb the liquid without overcooking the chicken.
- Natural release: Allow the pressure to release naturally for 10 minutes before switching the valve to venting. This resting period prevents the rice from losing too much moisture and keeps the chicken tender.
- Final fluff: Open the lid and gently fluff the rice with a fork. Remove the chicken to slice or shred it, then stir the rice once more to incorporate any remaining juices.
1Small adjustments can lead to a significantly better final texture.
- ●2Rinse the rice: Wash the rice in a fine-mesh strainer until the water runs clear to remove excess starch and prevent gumminess.
- ●3Avoid over-stirring: Once the chicken is placed on top, do not stir the pot again before cooking to maintain the correct layering.
- ●4Use a meat thermometer: Check that the thickest part of the chicken reaches 165°F to ensure it is safe and moist.
- ●5Deglaze thoroughly: Ensure no charred bits remain on the bottom of the stainless steel liner to avoid the Burn warning.
- ●6Rest the meat: Let the chicken sit for 5 minutes after removing it from the pot so the juices redistribute.
Delicious Variations |
You can modify this base recipe to fit different flavor profiles or dietary needs.
- ●Mexican Style: Stir in a teaspoon of cumin and chili powder, then top with fresh cilantro and lime juice. This mirrors the flavor profiles found in the Quick Street Corn Chicken Rice Bowl Quick Mexican Bowl
- ●Lemon Garlic: Add lemon zest to the rice and stir in fresh lemon juice and parsley after the pressure release.
- ●Vegetable Boost: Stir in diced carrots and frozen peas along with the rice for added nutrition and color.
- ●Creamy Mushroom: Sauté sliced mushrooms with the onions and stir in a tablespoon of cream or parmesan cheese at the end.
- ●Asian-Inspired: Replace chicken broth with a mix of broth and soy sauce, and add a slice of fresh ginger to the sauté step.
These changes allow you to repurpose the same cooking method for various cuisines throughout the month.
Best Ways to Serve |
Presentation and pairings can elevate this simple meal into a restaurant-style dinner.
- ●Fresh Greens: Serve alongside a crisp garden salad or steamed broccoli to add a fresh crunch.
- ●Sauce Toppings: Drizzle with a bit of melted butter or a splash of soy sauce for extra richness.
- ●Garnish: Sprinkle with sliced green onions or toasted sesame seeds for visual appeal.
For a more hearty presentation, serve the rice in a shallow bowl with the sliced chicken laid neatly across the top.
If you prefer a more diverse meal, consider pairing this with a light fruit salad, similar to the balance in the Best Chicken Salad With Grapes And Pecans Easy Creamy Chicken Salad Recipe
Storage and Leftovers |
Refrigerating
Store the chicken and rice in an airtight container in the refrigerator for up to 4 days. Keep the chicken and rice mixed together to help the meat retain moisture.
Reheating
Reheat in the microwave by adding a tablespoon of water or broth to the dish. Cover with a damp paper towel and heat for 2 minutes, stirring halfway through to steam the rice.
Freezing
This dish can be frozen for up to 3 months. Wrap the portions tightly in foil or use freezer-safe bags to prevent freezer burn.
Frequently Asked Questions |
- ●Q: Can I use brown rice instead of white rice?A: Yes, you can use brown rice, but you must increase the cooking time to approximately 22-25 minutes and increase the liquid slightly. Brown rice takes longer to soften and requires more hydration to reach the desired texture.
- ●Q: Why did my Instant Pot give me a Burn warning?A: This usually happens if there are burnt food particles on the bottom of the pot or if there is not enough liquid. Ensure you deglaze the pot thoroughly after searing the chicken to remove all browned bits.
- ●Q: Can I use chicken thighs instead of breasts?A: Chicken thighs are a great substitute and are often more forgiving. They may require a slightly different cook time, but their higher fat content usually results in a richer flavor and more tender meat.
- ●Q: How do I keep the rice from becoming mushy?A: The most important steps are rinsing the rice to remove starch and allowing a 10-minute natural pressure release. Quick-releasing the steam can cause the rice to boil over or lose its structure.
- ●Q: Do I have to sear the chicken first?A: Searing is optional but highly recommended for flavor. While the chicken will cook through without it, the browning process adds a caramelized depth that makes the dish taste more like a traditional oven meal.
Why This Recipe Belongs in Your Weekly Rotation |
The ability to create a complete, balanced meal with minimal effort is a significant advantage for any home cook. This recipe reduces the mental load of planning separate sides and mains, allowing you to focus on enjoying the meal.
Because the ingredients are versatile, you can adapt the flavor profile to suit whatever you have in the pantry. Whether you are craving something zesty or something savory, this method remains consistent.
Incorporating this into your routine ensures that you have a healthy, homemade option that competes with the convenience of takeout. It is a timeless combination that never fails to satisfy.
Final Thoughts |
This Instant Pot Chicken and Rice recipe simplifies the cooking process staples into one efficient cycle. It delivers tender meat and fluffy grains with very little active effort.
Gather your ingredients and let your pressure cooker handle the hard work tonight.
Easy Instant Pot Chicken and Rice Recipe
- Total Time: 35 minutes
- Yield: 4 servings 1x
Description
A comforting one-pot meal featuring tender chicken breasts and fluffy long-grain white rice cooked to perfection in the Instant Pot.
Ingredients
- 1.5 lbs boneless skinless chicken breasts
- 1.5 cups long-grain white rice, rinsed
- 2 cups chicken broth
- 1 tablespoon olive oil
- 1 small onion, finely diced
- 3 cloves garlic, minced
- 1 teaspoon salt
- 1/2 teaspoon black pepper
Instructions
- Set the Instant Pot to Sauté and add olive oil. Brown the chicken breasts for 3-4 minutes per side, then remove them from the pot.
- Add the diced onion and minced garlic to the pot. Sauté for 2 minutes until fragrant.
- Pour in 1/4 cup of chicken broth and scrape the bottom of the pot with a wooden spoon to remove all browned bits.
- Stir in the rinsed rice and the remaining chicken broth, ensuring the rice is evenly distributed.
- Place the seared chicken breasts on top of the rice layer.
- Close the lid, set the valve to Sealing, and cook on High Pressure for 8 minutes.
- Allow the pressure to release naturally for 10 minutes, then carefully vent any remaining steam.
- Remove the chicken to a plate, fluff the rice with a fork, and serve.
- Prep Time: 10 minutes
- Cook Time: 25 minutes
- Category: Dinner
- Method: Pressure Cooking
- Cuisine: American