Have you ever craved the raw dough more than the cookie?
I first discovered this obsession through my cousin Sarah, a pastry chef who swore that some flavors are actually improved oven. She brought a tray of these bars to a summer potluck, and they disappeared in under ten minutes.
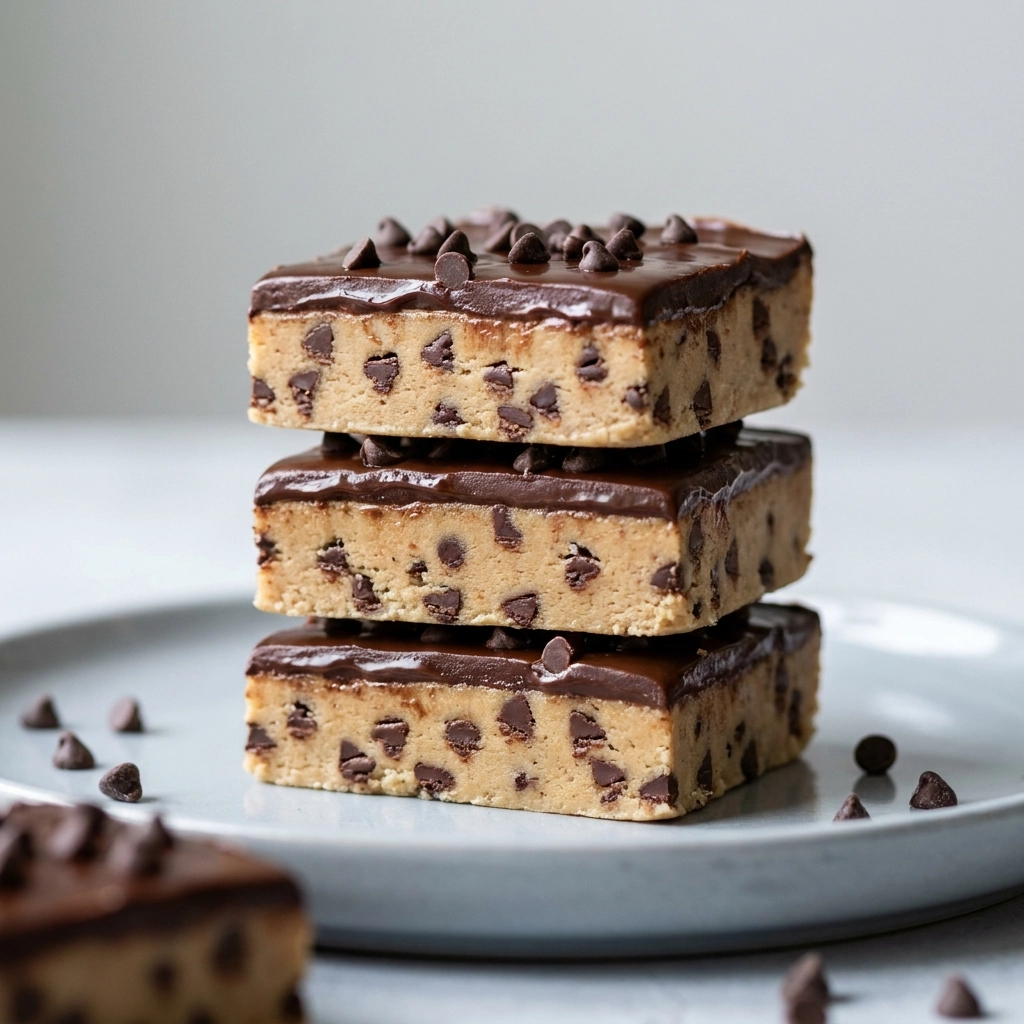
These bars are essentially a stabilized, edible version of classic chocolate chip cookie dough. They provide that nostalgic, buttery sweetness in a convenient sliceable format.
Readers love this recipe because it removes the guilt and the wait time associated with traditional baking. It captures the essence of a childhood kitchen experiment but feels like a gourmet treat.
Unlike store-bought edible doughs that often taste artificial, this version relies on real butter and heat-treated flour for an authentic profile. It is a cleaner, richer alternative to processed snacks.
This recipe is the ultimate solution for anyone with a sweet tooth who lacks the patience for preheating a stove. Indulgent Edible Cookie Dough Recipe For Sweet Cravings
Let us dive into the components that make this treat so addictive.
- ●Why You’ll Love This Recipe
- ●A Brief Background / Why This Recipe Works
- ●Perfect For Dessert Parties and Sweet Cravings
- ●Main Ingredient Spotlight: Heat-Treated Flour
- ●Secondary Ingredient Spotlight: Brown Sugar
- ●Key Ingredients
- ●How to Make It
- ●Pro Tips
- ●Delicious Variations
- ●Best Ways to Serve
- ●Storage and Leftovers
- ●Frequently Asked Questions
- ●Why This Recipe Belongs in Your Weekly Rotation
- ●Final Thoughts
This treat is more than just a dessert; it is a shortcut to pure nostalgia. Here is exactly why it earns a spot in your kitchen.
- ●The texture is incredibly dense and fudge-like. This happens because the high ratio of fats to flour creates a melt-in-your-mouth experience.
- ●There is absolutely no oven time required. You save a significant amount of energy and avoid heating up your kitchen during the summer.
- ●It is highly customizable. You can swap the chocolate chips for nuts or dried fruits to suit your specific mood.
- ●The flavor profile is perfectly balanced. The salt cuts through the heavy sweetness of the sugar to prevent it from being cloying.
- ●It serves a crowd effortlessly. Slicing a tray of bars is far more efficient than scooping individual cookies.
- ●Preparation time is minimal. You can move from pantry to plate in under twenty minutes of active work.
- ●The ingredient list is simple. You likely already have every single component in your cupboard right now.
- ●It appeals to all ages. Children love the “forbidden” nature of eating dough, and adults appreciate the rich taste.
Once you taste the contrast between the creamy base and the snap of the chocolate, you will never go back to store-bought versions.
A Brief Background / Why This Recipe Works |
The magic of this recipe lies in the science of “edible” dough. Raw flour can occasionally contain bacteria, so the process of heat-treating it makes the recipe safe while removing the raw, metallic taste of uncooked grain.
You’ll notice that we use a combination of white and brown sugars. The brown sugar provides a deep, molasses-like undertone that mimics the caramelization of a baked cookie, even though no heat is applied to the final product.
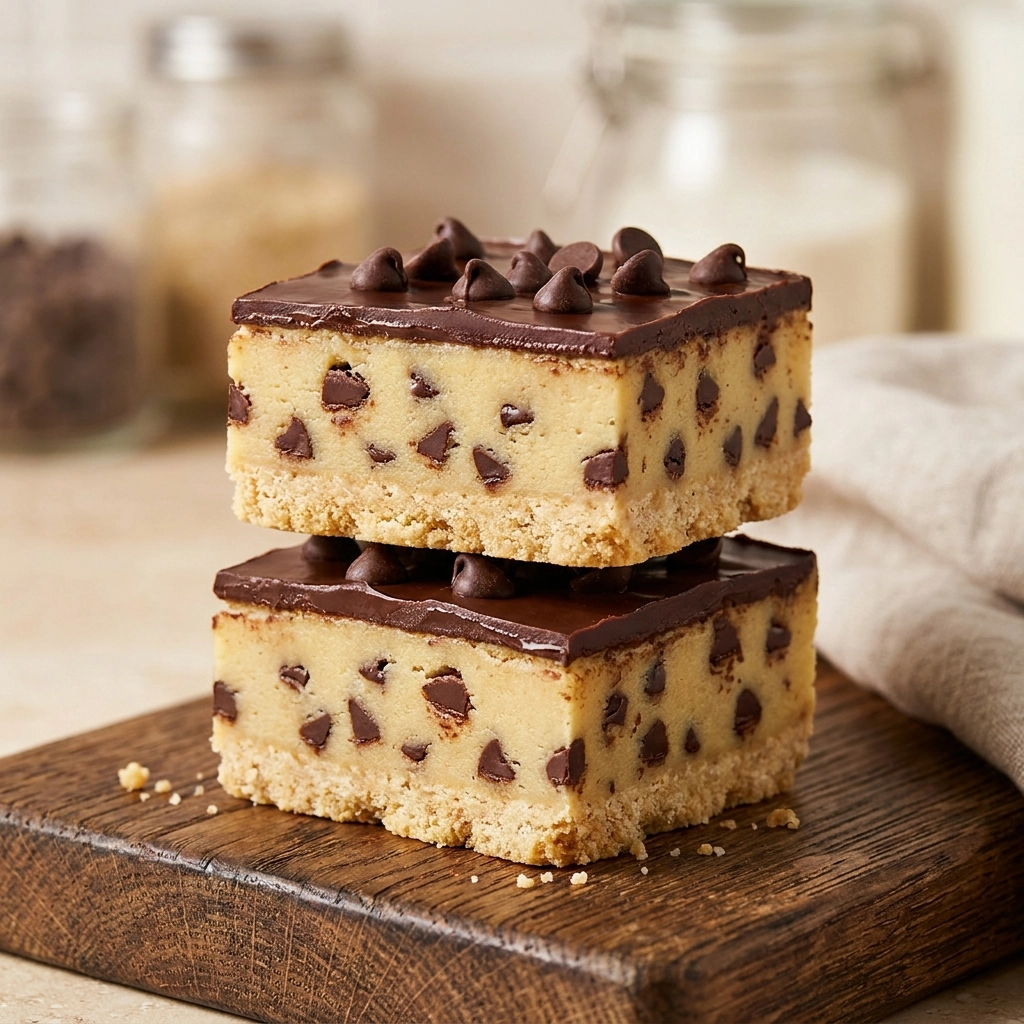
The binding is achieved through a high-fat butter base, which ensures the bars stay firm in the fridge but soft on the tongue. This creates a structural integrity that allows for clean cuts without the bars crumbling.
If you enjoy this style of treat, you might also like the Next Level Chocolate Peanut Butter Bars No Bake Recipe Recipe 30 Min Family Dinner Everyone Loves
Perfect For Dessert Parties and Sweet Cravings |
These bars are a lifesaver for busy weeknights when a craving hits but you are too exhausted to scrub baking sheets. They offer an instant reward with almost zero cleanup.
For meal prep enthusiasts, these are ideal because they can be portioned into small squares and kept in the freezer. You simply grab one on your way out the door for a quick energy boost.
They shine during holiday gatherings where oven space is at a premium. When the turkey and stuffing are taking up every rack, a no-bake dessert is a strategic victory.
Main Ingredient Spotlight: Heat-Treated Flour |
Flour is the structural backbone of these bars. flour in the oven or microwave first, you neutralize any potential bacteria and toast the starch, which gives the dough a nuttier, more sophisticated flavor.
Without the heat treatment, the bars would taste overly “floury” and would not be safe for consumption. This step is the difference between a reckless snack and a professional dessert.
Secondary Ingredient Spotlight: Brown Sugar |
Brown sugar is the secret to that authentic cookie taste. Its moisture content adds a chewiness that white sugar simply cannot replicate.
The molasses in brown sugar creates a rich, golden hue and a complex sweetness. Skipping this in favor of only white sugar results in a bar that tastes more like a frosting than a cookie dough.
Key Ingredients |
Each component plays a specific role in achieving the perfect consistency and taste.
- ●Flour — Provides the necessary bulk and structure to make the bars sliceable.
- ●Butter — Acts as the primary fat source for a rich, creamy mouthfeel.
- ●Brown Sugar — Adds depth of flavor and a characteristic chew.
- ●White Sugar — Ensures the sweetness is bright and the texture remains smooth.
- ●Vanilla Extract — Enhances the aromatic qualities and ties the sugar and butter together.
- ●Salt — Balances the sweetness and elevates the chocolate flavor.
- ●Chocolate Chips — Adds texture and bursts of intense cocoa.
 How to Make It |
Follow these steps carefully to ensure your bars set properly and taste professional.
- Heat-treat the flour: Place your flour in a microwave-safe bowl and heat in 30-second bursts, stirring in between, until it reaches 160°F. This ensures the flour is safe and smells slightly toasted. Avoid overheating the flour, as it can burn and make the bars taste bitter.
- Cream the fats and sugars: Beat the softened butter with both sugars until the mixture looks pale and fluffy. You want to see a smooth paste without any graininess. Do not over-beat the mixture, or you will incorporate too much air, making the bars too soft.
- Add flavorings: Stir in the vanilla extract and salt until fully incorporated. The scent should be fragrant and sweet. Trust your nose here; if the vanilla is too faint, add an extra drop.
- Fold in the treated flour: Slowly add the cooled heat-treated flour to the butter mixture. Stir until no white streaks remain and the dough is a uniform tan color. Be careful not to over-mix, as this can make the dough tough.
- Mix in the chips: Fold in the chocolate chips using a spatula. Ensure the chips are evenly distributed throughout the dough. Your pan should be lined with parchment paper before you add the dough to prevent sticking.
- Press into the pan: Transfer the dough to your prepared pan and press down firmly with a flat spatula. The surface should be completely level. If you leave air pockets, the bars will break when sliced.
- Chill and set: Place the pan in the refrigerator for at least two hours. The bars should feel firm to the touch when pressed. Cutting them too early will result in a messy, gooey heap.
For a different kind of indulgence, try the Nutella Stuffed Cookie Pie The Ultimate Gooey Chocolate Dessert
1Small adjustments in technique can lead to a massive difference in the final result.
- ●2Room Temperature Butter: Use butter that is soft but not melted. Melted butter will make the dough greasy and prevent the bars from setting.
- ●3Sift the Flour: After heat-treating, sift the flour to remove any clumps. This ensures a perfectly smooth texture.
- ●4Chill the Chips: Use chilled chocolate chips for a sharper “snap” when you bite into the bars.
- ●5The Hot Knife Trick: Dip your knife in hot water and wipe it dry between each cut. This produces perfectly clean, sharp edges.
- ●6Measure Accurately: Use a kitchen scale for the flour. Too much flour makes the bars dry, while too little makes them mushy.
Delicious Variations |
Once you master the base, you can experiment with these flavor twists.
- ●Double Chocolate: Swap half of the chocolate chips for cocoa powder and mini chocolate chips.
- ●White Chocolate Macadamia: Use white chocolate chips and toasted macadamia nuts for a tropical vibe.
- ●Peanut Butter Swirl: Gently swirl melted peanut butter into the dough before chilling.
- ●Birthday Cake: Use rainbow sprinkles instead of chocolate chips and add a touch of almond extract.
- ●Sea Salt Caramel: Top the bars with a drizzle of salted caramel and a pinch of flaky sea salt.
These variations allow you to adapt the recipe for any season or special occasion.
Best Ways to Serve |
Presentation elevates the experience from a simple snack to a dessert course.
- ●A la Mode: Serve a room-temperature square with a scoop of vanilla bean ice cream.
- ●Dessert Platter: Arrange the bars with fresh strawberries and raspberries to add a tart contrast.
- ●Coffee Pairing: Pair a chilled bar with a hot cup of black coffee to balance the richness.
You’ll notice that serving these on a slate board or a white ceramic platter makes the colors pop. The contrast of the deep brown chocolate against a light background is visually stunning.
Depending on the crowd, you can either serve them chilled for a fudge-like consistency or let them sit for ten minutes to soften. Both methods offer a unique eating experience.
Storage and Leftovers |
Refrigerating
Keep the bars in an airtight container in the fridge for up to 7 days. This maintains the creamy texture and prevents the butter from spoiling.
Reheating
Do not microwave these bars. If they are too cold, let them sit at room temperature for 15 minutes to regain their softness.
Freezing
Wrap individual squares in parchment paper and store them in a freezer bag for up to 3 months. Thaw in the fridge overnight before serving.
Frequently Asked Questions |
- ●Q: How do I know if the flour is heat-treated correctly?A: You should use a digital thermometer to ensure the flour reaches 160°F. If you do not have a thermometer, look for the flour to steam slightly and smell toasted. This process kills bacteria and ensures the dough is safe for raw consumption.
- ●Q: Can I use a food processor to make this faster?A: While you can pulse the ingredients, a hand mixer or spatula is preferred. A food processor can over-work the flour and incorporate too much air, which ruins the dense, fudgy texture we are aiming for in these bars.
- ●Q: Is there a substitute for brown sugar?A: You can use white sugar mixed with a tablespoon of molasses. This mimics the flavor and moisture of brown sugar. Using only white sugar will result in a bar that is too sweet and lacks the characteristic cookie dough depth.
- ●Q: Why are my bars too soft to slice?A: This usually happens if the butter was melted instead of softened, or if the bars were not chilled long enough. Ensure they stay in the refrigerator for at least two full hours to allow the fats to solidify properly.
- ●Q: Can I make these vegan?A: Yes, you can substitute the butter with a high-quality vegan butter stick and use dairy-free chocolate chips. Make sure the vegan butter is chilled properly to ensure the bars set firmly in the refrigerator.
Why This Recipe Belongs in Your Weekly Rotation |
Having a reliable, no-bake treat in your repertoire reduces the stress of hosting and snacking. It provides a high-reward dessert with a low-effort process, making it a practical addition to any home.
The versatility of the ingredients means you can pivot the flavor profile based on what you have in your pantry. It is a sustainable way to satisfy a sweet tooth without the waste of failed baking attempts.
Ultimately, this recipe bridges the gap between a childhood craving and a sophisticated dessert. It is a crowd-pleaser that consistently delivers a professional result every single time.
Final Thoughts |
These No Bake Chocolate Chip Cookie Dough Bars combine the safety of heat-treated flour with the indulgence of real butter and chocolate. They offer a rich, dense texture that satisfies the most intense cravings without requiring a single minute of oven time.
You should make these because they eliminate the risk of burnt edges or underbaked centers. They are the perfect solution for anyone who prefers the dough to the cookie and wants a consistent, delicious result.
Treat yourself to a batch today and rediscover the joy of the forbidden dough!
No Bake Chocolate Chip Cookie Dough Bars
- Total Time: 15 minutes
- Yield: 16 bars 1x
Description
A rich, fudgy, and completely edible version of chocolate chip cookie dough. No baking required, just simple chilling for a perfect treat.
Ingredients
- 2 cups all-purpose flour (heat-treated)
- 1 cup unsalted butter, softened
- 1/2 cup packed brown sugar
- 1/2 cup granulated white sugar
- 2 tsp vanilla extract
- 1/2 tsp salt
- 1 1/2 cups semi-sweet chocolate chips
Instructions
- Heat-treat flour in the microwave in 30-second intervals until it reaches 160°F; let cool completely.
- In a large bowl, cream together the softened butter, brown sugar, and white sugar until fluffy.
- Stir in the vanilla extract and salt until well combined.
- Gradually mix in the cooled, heat-treated flour until a thick dough forms.
- Fold in the chocolate chips using a spatula.
- Press the dough firmly into an 8×8 inch pan lined with parchment paper.
- Refrigerate for at least 2 hours before slicing into squares.
- Prep Time: 15 minutes
- Cook Time: 0 minutes
- Category: Dessert
- Method: No-Bake
- Cuisine: American