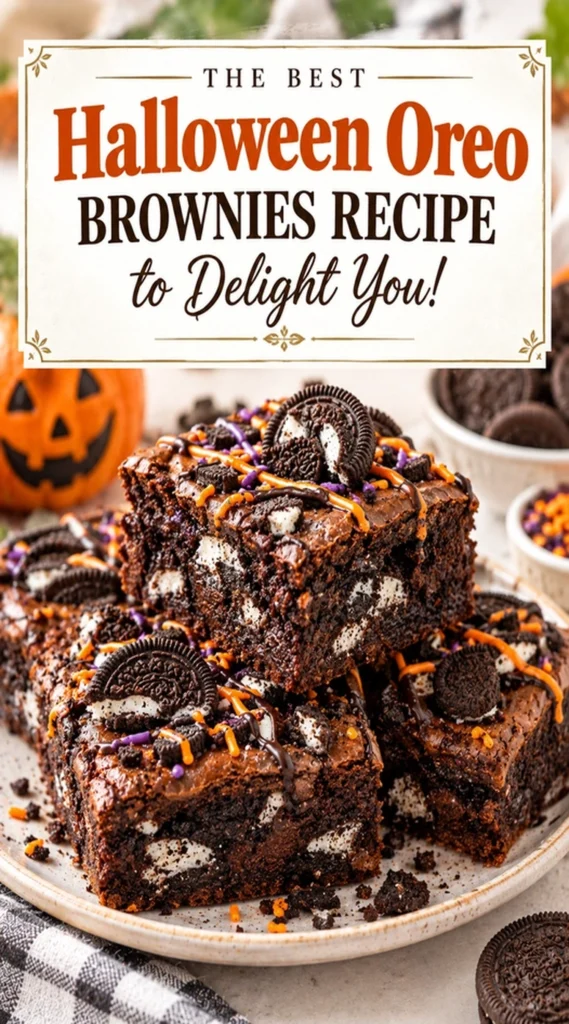
These Halloween Oreo Brownies are dense, fudgy chocolate bars layered with chunks of classic cream-filled cookies. They provide a rich dessert option that balances the deep cocoa of a brownie with the nostalgic crunch of an Oreo.
This dessert is a crowd-pleaser for October gatherings, offering a visually striking look when topped with festive decorations. The contrast between the smooth chocolate and the cookie pieces creates a multi-textured experience.
Many people appreciate this recipe because it elevates a standard brownie into something celebratory without requiring professional pastry skills.
Unlike store-bought boxed mixes, these brownies have a deeper chocolate profile and a heavier, more satisfying crumb.
This recipe is ideal for home bakers who want a high-impact dessert that is simple to execute. One practical reason this suits a busy cook is that the batter comes together in one bowl, reducing cleanup time.
Whether you are hosting a large party or preparing a small treat for the family, these brownies fit the mood. The following guide explains how to achieve the perfect fudge consistency every time.
- ●Why You’ll Love This Recipe
- ●A Brief Background on Why This Recipe Works
- ●Perfect For Festive Halloween Parties
- ●Main Ingredient Spotlight: Cocoa Powder
- ●Secondary Ingredient Spotlight: Oreo Cookies
- ●Key Ingredients
- ●How to Make It
- ●Pro Tips
- ●Delicious Variations
- ●Best Ways to Serve
- ●Storage and Leftovers
- ●Frequently Asked Questions
- ●Why This Recipe Belongs in Your Weekly Rotation
- ●Final Thoughts
These brownies provide a reliable balance of sweetness and richness that appeals to both children and adults.
- ●Deeply fudgy texture that avoids the cakey consistency of some brownies.
- ●The addition of Oreo cookies provides a distinct crunch in every bite.
- ●Minimal equipment is required, as most mixing happens in a single bowl.
- ●The recipe is highly adaptable for different types of chocolate or cookies.
- ●It works well as a handheld treat for parties or as a plated dessert.
- ●Preparation is fast, making it easy to fit into a busy holiday schedule.
- ●The dark chocolate color provides a natural Halloween aesthetic.
- ●It pairs perfectly with other treats like Irresistible Halloween Sugar Cookie Bars Recipe To Delight Easy Halloween Dessert
- ●The flavors are familiar and widely loved, reducing the risk of picky eaters.
Combining the richness of cocoa with the creaminess of the cookies makes this a standout choice for any autumn menu.
A Brief Background on Why This Recipe Works |
The success of this recipe lies in the ratio of fats to flour. By using a higher proportion of butter and chocolate, the brownies maintain a dense, moist structure rather than becoming airy like a cake.
The Oreo cookies serve two purposes: they add a textural contrast and introduce a hint of vanilla cream that cuts through the intensity of the dark chocolate.
Using melted butter helps distribute the sugar and cocoa evenly, resulting in that characteristic shiny, crackly top that many chocolate lovers look for.
This combination of ingredients ensures the brownies remain moist for several days, which is helpful for those prepping in advance for a holiday.
Perfect For Festive Halloween Parties |
These brownies are a natural fit for Halloween celebrations because their dark color matches the spooky theme. They can be cut into small squares for easy grazing or shaped into festive silhouettes using cookie cutters.
For those managing a full menu, these bars are excellent for make-ahead prep. They can be baked a day early and stored at room temperature, leaving more time to focus on savory items like Spooktacular Halloween Buffalo Chicken Dip Recipe Delight Easy Halloween Party Appetizer
Family gatherings also benefit from this recipe, as it is simple enough for children to help with the stirring and the cookie crushing process.
Main Ingredient Spotlight: Cocoa Powder |
Cocoa powder is the foundation of the flavor profile. It provides an intense, concentrated chocolate taste without adding the extra fat found in melted chocolate bars. For a more mellow flavor, Dutch-processed cocoa can be used, while natural cocoa powder offers a slightly more acidic, sharp chocolate note.
Secondary Ingredient Spotlight: Oreo Cookies |
Oreo cookies bring a nostalgic element and a necessary structural variation. The chocolate wafers blend into the brownie, while the cream filling creates small pockets of sweetness throughout the bake.
Breaking the cookies into uneven pieces rather than fine crumbs creates a more interesting mouthfeel. This ensures that some bites are predominantly fudgy while others have a satisfying crunch.
Key Ingredients |
Each component of this recipe is chosen to enhance the richness of the chocolate base.
- ●Unsalted Butter — provides moisture and a rich, buttery flavor; can be replaced with coconut oil for a dairy-free alternative.
- ●Granulated Sugar — creates the sweet base and contributes to the crackly top crust.
- ●Eggs — act as the binding agent and provide the necessary lift for the structure.
- ●Cocoa Powder — delivers the deep chocolate flavor and dark color.
- ●All-Purpose Flour — gives the brownies their body and prevents them from becoming too soft.
- ●Vanilla Extract — enhances the chocolate notes and adds a subtle aromatic sweetness.
- ●Oreo Cookies — adds texture and a creamy contrast to the dark chocolate.
- ●Salt — balances the sweetness and intensifies the cocoa flavor.
How to Make It |
Following these steps carefully will result in a brownie that is fudgy on the inside and crisp on the top.
- Prepare the oven and pan: Preheat your oven to 325°F (165°C). Grease an 8×8 inch baking pan with butter or line it with parchment paper, leaving an overhang on the sides. Using parchment paper is recommended to avoid the brownies sticking and to make removal easier.
- Melt the butter: Melt the unsalted butter in a microwave-safe bowl in 30-second intervals or in a small saucepan over low heat. Avoid overheating the butter to the point where it browns, as this will change the flavor profile of the chocolate.
- Combine sugar and fats: Stir the granulated sugar into the melted butter until well combined. Whisk in the eggs one at a time, followed extract. Stir until the mixture is smooth and the sugar has begun to dissolve into the liquids.
- Sift and mix dry ingredients: Sift the cocoa powder, flour, and salt directly into the wet mixture. Use a spatula to fold the ingredients together gently. Stop stirring as soon as the flour streaks disappear; overmixing at this stage can introduce too much air, making the brownies cakey instead of fudgy.
- Fold in the cookies: Roughly chop the Oreo cookies into quarters or thirds. Fold them into the batter using a folding motion. Be careful not to crush the cookies completely, as you want visible chunks of cookie in the finished product.
- Bake the brownies: Pour the batter into the prepared pan and smooth the top with a spatula. Bake for 25 to 30 minutes. To check for doneness, insert a toothpick into the center; it should come out with a few moist crumbs attached. If the toothpick is clean, the brownies are overbaked.
- Cool and set: Remove the pan from the oven and let it cool completely in the pan for at least one hour. Cutting into hot brownies often results in them falling apart; cooling allows the fudge structure to set.
1Small adjustments in technique can significantly improve the final result of these brownies.
- ●2Room temperature eggs: Use eggs that have sat out for 30 minutes to ensure they emulsify properly with the melted butter.
- ●3Avoid overbaking: Start checking the brownies at the 22-minute mark, as oven temperatures can vary.
- ●4Use a serrated knife: When cutting the cooled brownies, a serrated knife prevents the Oreo chunks from pulling out of the brownie.
- ●5Quality cocoa: Use a high-quality Dutch-processed cocoa for a darker, smoother chocolate taste.
- ●6Parchment sling: Always leave an inch of parchment paper hanging over the edges to lift the entire block of brownies out of the pan effortlessly.
Delicious Variations |
While the classic version is excellent, these tweaks can adapt the recipe for different tastes.
- ●White Chocolate Oreo: Swap the cocoa powder for melted white chocolate and increase the flour slightly to maintain structure.
- ●Peanut Butter Swirl: Microwave a small amount of peanut butter and swirl it into the top of the batter before baking.
- ●Minty Twist: Add a drop of peppermint extract to the batter for a refreshing holiday flavor.
- ●Salted Caramel: Drizzle salted caramel over the cooled brownies before cutting them into squares.
- ●Double Chocolate: Add a handful of semi-sweet chocolate chips along with the Oreo pieces for extra richness.
These adjustments allow you to customize the dessert based on what you have in your pantry or the specific preferences of your guests.
Best Ways to Serve |
Presentation can make these brownies feel like a professional dessert. For a Halloween party, arrange them on a platter alongside Spooky Eyeball Brownies A Chilling Halloween Treat Easy Halloween Dessert Idea for a variety of chocolate textures.
- ●Warm with Ice Cream: Serve a square slightly warmed in the microwave with a scoop of vanilla bean ice cream.
- ●Festive Toppings: Use orange-colored frosting or sprinkles to create a Halloween theme.
- ●Coffee Pairing: Serve these as a pairing with a dark roast coffee or a cold glass of milk to balance the richness.
For a more formal presentation, dust the tops with a light coating of powdered sugar. This provides a sharp contrast against the dark chocolate.
Cutting the brownies into small, bite-sized cubes makes them more manageable for guests who are trying several different desserts at a party.
Storage and Leftovers |
Refrigerating
Store the brownies in an airtight container in the refrigerator for up to 5 days. Refrigeration makes the texture denser and more fudge-like.
Reheating
To restore the fudgy texture, microwave a single square for 10 to 15 seconds. Avoid reheating the entire batch at once to prevent drying out the edges.
Freezing
Wrap individual squares in plastic wrap and place them in a freezer-safe bag for up to 3 months. Thaw them in the refrigerator overnight before serving.
Frequently Asked Questions |
- ●Q: Why are my brownies cakey instead of fudgy?A: This usually happens if the batter is overmixed, which incorporates too much air into the flour. It can also occur if the oven temperature is too low, causing the brownies to bake slower and rise more. To keep them fudgy, stir the dry ingredients just until combined.
- ●Q: Can I use a different type of cookie instead of Oreos?A: Yes, any cream-filled sandwich cookie will work. Golden Oreos provide a lighter flavor, while chocolate-mint cookies add a different aromatic profile. Ensure the cookies are similar in size to maintain the correct distribution of texture throughout the batter.
- ●Q: Is it possible to make these brownies gluten-free?A: You can substitute the all-purpose flour with a 1:1 gluten-free flour blend and use gluten-free Oreo alternatives. Because the recipe is already dense, the texture remains quite similar to the original version, though the edges may be slightly softer.
- ●Q: How do I stop the brownies from sticking to the pan?A: The most effective method is lining the pan with parchment paper. If you do not have parchment, grease the pan thoroughly with butter and dust it with a light coating of cocoa powder instead of flour to avoid white streaks.
- ●Q: Why did my brownies sink in the middle?A: A sunken center usually indicates that the brownies were removed from the oven too early or that there was too much leavening if you added baking powder. Ensure you follow the toothpick test and allow them to cool completely before moving them.
Why This Recipe Belongs in Your Weekly Rotation |
While these are themed for Halloween, the combination of chocolate and cream cookies is a timeless pairing. This recipe provides a consistent result that satisfies cravings for something rich and indulgent without requiring hours of effort.
The simplicity of the one-bowl method makes it a practical choice for those who enjoy baking but dislike extensive cleanup. It is a versatile base that can be modified for any occasion throughout the year.
Having a reliable brownie recipe ensures you always have a dessert that can be scaled up for guests or kept in the freezer for a quick sweet treat. These brownies offer a level of quality that outperforms most store-bought alternatives.
Final Thoughts |
These Halloween Oreo Brownies combine the intensity of dark chocolate with the crunchy, creamy elements of classic cookies. They are designed to be dense, moist, and visually appealing for any October celebration.
Gather your ingredients and bring a touch of chocolatey magic to your Halloween celebrations this year.
The Best Halloween Oreo Brownies Recipe to Delight You!
- Total Time: 45 minutes
- Yield: 16 squares 1x
Description
Rich, fudgy chocolate brownies loaded with chunks of Oreo cookies. A perfect, decadent dessert for Halloween parties or cozy autumn nights.
Ingredients
- 1/2 cup unsalted butter, melted
- 1 cup granulated sugar
- 2 large eggs, room temperature
- 1 teaspoon vanilla extract
- 1/2 cup cocoa powder
- 1/2 cup all-purpose flour
- 1/4 teaspoon salt
- 12–15 Oreo cookies, roughly chopped
Instructions
- Preheat oven to 325°F (165°C) and grease an 8×8 inch baking pan or line it with parchment paper.
- Stir melted butter and granulated sugar together in a bowl until combined.
- Whisk in eggs one at a time, then stir in the vanilla extract until the mixture is smooth.
- Sift in cocoa powder, flour, and salt. Fold gently with a spatula until just combined; do not overmix.
- Gently fold in the chopped Oreo cookies, ensuring they are distributed evenly.
- Pour batter into the pan and bake for 25-30 minutes, or until a toothpick inserted in the center comes out with a few moist crumbs.
- Remove from oven and cool completely in the pan for at least one hour before slicing into squares.
- Prep Time: 15 minutes
- Cook Time: 30 minutes
- Category: Dessert
- Method: Baking
- Cuisine: American