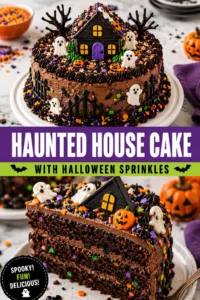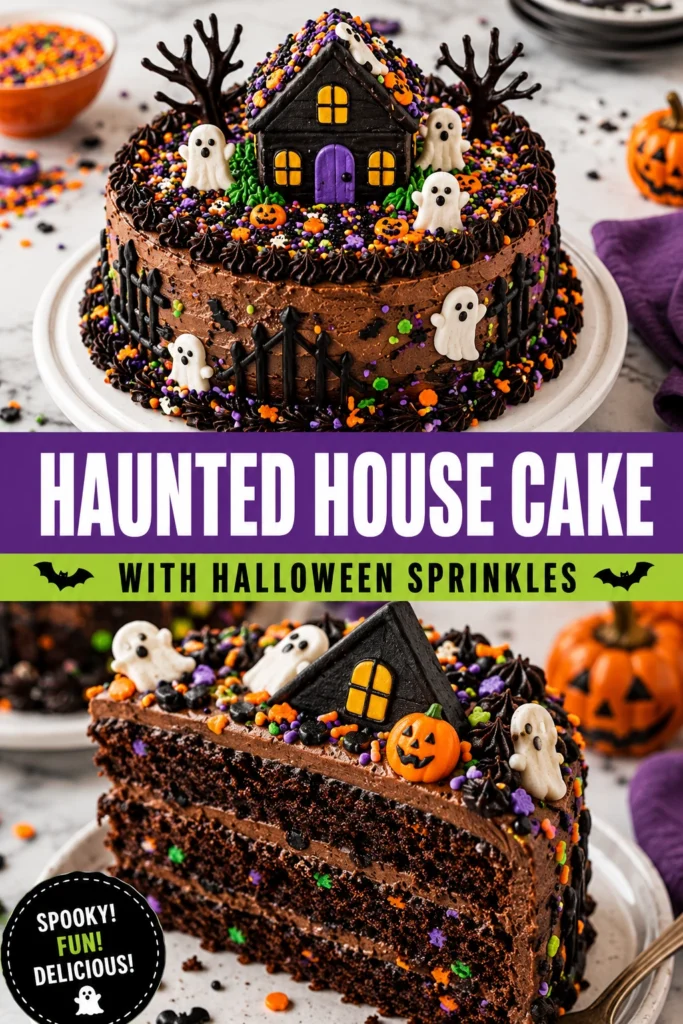
Deep cocoa layers and jagged peaks of gray frosting create a striking visual that looks like a derelict manor. This cake transforms a standard chocolate dessert into a thematic centerpiece that captures the essence of October.
Constructing a themed cake often feels intimidating, but this design relies on simple geometric stacking rather than complex sculpting. It provides a tactile experience for both the baker and the guests.
Home bakers appreciate this recipe because it balances a professional look with accessible techniques. You do not need a degree in pastry arts to achieve the crooked, haunted aesthetic.
Unlike store-bought cakes that often rely on overly sweet chemical stabilizers, this version uses real butter and cocoa for a rich, authentic taste.
Parents and party hosts will find this perfect for children who love the thrill of Halloween but still want a delicious treat. It turns dessert time into an activity.
Planning the assembly in stages makes the process manageable and stress-free. Here is everything you need to build your own edible spooky mansion.
- ●Why You’ll Love This Recipe
- ●A Brief Background on the Design
- ●Perfect For Halloween Parties and Family Gatherings
- ●The Power of Cocoa
- ●The Role of Buttercream
- ●Key Ingredients
- ●How to Make It
- ●Pro Tips
- ●Delicious Variations
- ●Best Ways to Serve
- ●Storage and Leftovers
- ●Frequently Asked Questions
- ●Why This Recipe Belongs in Your Weekly Rotation
- ●Final Thoughts
This dessert combines a whimsical theme with a reliable flavor profile that appeals to guests of all ages.
- ●The structural design allows for creative freedom with the “ruined” look.
- ●Rich chocolate cake provides a sturdy base for stacking layers.
- ●Customizable frosting colors let you set the mood from ghostly white to eerie gray.
- ●Halloween sprinkles add immediate pops of color and texture.
- ●The process of building the house is an engaging family activity.
- ●It works as a standalone dessert or a centerpiece for a larger spread.
- ●Ingredients are common pantry staples that do not require specialty trips.
- ●The jagged edges of the house mean perfection is not required.
Combining these elements results in a cake that tastes as good as it looks on a party table.
A Brief Background on the Design |
The concept of a haunted house cake relies on the beauty of imperfection. Instead of smooth, professional lines, this design encourages slightly tilted layers and uneven frosting to mimic a decaying building.
Using a tiered approach allows for a peaked roof and a wider base, providing stability while maintaining the architectural theme. This method is similar to how builders approach real structures, just with sponge and sugar.
Adding themed decorations like sprinkles transforms the cake from a simple chocolate dessert into a narrative piece. It tells a story of a spooky dwelling through edible art.
Perfect For Halloween Parties and Family Gatherings |
This cake is an ideal choice for organized Halloween parties where a visual “wow” factor is needed. It serves as a conversation starter and a sweet finale to a themed evening.
For family gatherings, the assembly process can be shared. Children can help apply the sprinkles or place the “cobwebs” of frosting, making it a collaborative effort.
It also fits well into seasonal rotations for those who enjoy baking themed treats throughout October. It pairs exceptionally well with other spooky sweets like Spooky Pizza With Halloween Sprinkles Easy Halloween Dessert Pizza Recipe
The Power of Cocoa |
Cocoa powder is the foundation of this recipe, providing the deep, dark color necessary for a spooky theme. It offers a bittersweet contrast to the sugary frosting, preventing the cake from becoming cloying.
The fat content in the cocoa helps create a moist crumb that holds up under the weight of multiple tiers. This structural integrity is vital when stacking cakes to create the house shape.
The Role of Buttercream |
Buttercream acts as both the glue and the paint for the haunted house. Its thickness allows it to hold peaks and ridges, which are essential for creating the look of weathered stone or peeling paint.
Key Ingredients |
Each component plays a specific role in ensuring the cake is both stable and flavorful.
- ●All-purpose flour — provides the basic structure and bulk of the cake layers.
- ●Unsweetened cocoa powder — creates the dark, rich chocolate flavor and deep color.
- ●Granulated sugar — sweetens the sponge and helps tenderize the crumb.
- ●Unsalted butter — adds richness to the cake and creates a smooth, pipeable frosting.
- ●Large eggs — bind the ingredients together and provide lift during baking.
- ●Buttermilk — adds moisture and a slight tang to balance the chocolate.
- ●Halloween sprinkles — provide the festive color and a crunch to the exterior.
- ●Vanilla extract — enhances the overall flavor profile of both cake and icing.
How to Make It |
Follow these steps carefully to ensure your house stands tall and looks appropriately eerie.
- Prepare the cake layers: Mix your dry ingredients and wet ingredients separately before combining them. Bake the layers until a toothpick comes out clean; overbaking will lead to a dry cake that cracks when you stack it.
- Cool completely: Let the cakes rest in the pan for ten minutes before transferring them to a wire rack. Attempting to frost a warm cake will cause the buttercream to melt and slide, ruining the structural integrity of your house.
- Level the cakes: Use a serrated knife to slice off the domed tops of each cake layer. This creates flat surfaces that prevent the house from leaning or sliding as you add height.
- Stack and fill: Place the largest layer on the bottom and spread a layer of frosting on top. Press the next smaller layer firmly onto the frosting to ensure it is locked in place.
- Apply the crumb coat: Spread a thin layer of frosting over the entire exterior to seal in crumbs. Chill the cake for 20 minutes to set this layer, which prevents cake bits from appearing in your final decorative coat.
- Decorate the exterior: Apply a thicker layer of frosting using a palette knife to create jagged, uneven textures. Avoid making it too smooth, as a haunted house should look weathered and old.
- Add the sprinkles: Press the Halloween sprinkles into the frosting while it is still tacky. If the frosting sets too much, the sprinkles will simply roll off the sides of the cake.
- Final spooky touches: Pipe small windows or a door using a contrasting color of frosting. Ensure these are placed slightly off-center to enhance the crooked, spooky aesthetic.
1Small adjustments in technique can lead to a much more impressive result.
- ●2Freeze the layers: Briefly freezing the cake layers for 30 minutes before leveling makes the cake firmer and reduces crumbs.
- ●3Use a turntable: A rotating cake stand allows you to apply frosting evenly and see the house from all angles.
- ●4Sift your cocoa: Cocoa powder often clumps; sifting it ensures a smooth batter without bitter pockets of dry powder.
- ●5Chill between steps: Always let the cake set in the fridge after adding a new tier or a layer of frosting.
- ●6Experiment with colors: Add a tiny drop of black food coloring to white frosting to create a perfect concrete-gray hue.
Delicious Variations |
You can easily adapt this recipe to suit different tastes or dietary preferences.
- ●Red Velvet Base: Use a red velvet cake instead of chocolate for a striking color contrast when sliced.
- ●Cream Cheese Frosting: Swap the buttercream for cream cheese frosting for a tangier flavor that pairs well with cocoa.
- ●Pumpkin Spice Infusion: Fold pumpkin puree and cinnamon into the batter for a more seasonal autumn flavor.
- ●Gluten-Free Option: Replace the all-purpose flour with a high-quality 1:1 gluten-free blend to accommodate dietary needs.
- ●Chocolate Ganache Drip: Add a dark chocolate drip around the edges for a look similar to the Haunted House Cake With Chocolate Ganache Spooky Halloween Dessert Idea
These variations allow you to personalize the cake while keeping the haunted architectural theme intact.
Best Ways to Serve |
Presentation is key when serving a themed dessert like this.
- ●Place the cake on a black platter or a wooden board to enhance the spooky vibe.
- ●Surround the base with candy corn or plastic spiders for added atmosphere.
- ●Serve with a side of warm apple cider or a cold glass of milk.
- ●Slice the cake into tall, thin wedges to showcase the layered interior.
For a full party spread, consider pairing this with Candy Apples With Halloween Sprinkles Easy Halloween Treat Ideas For Kids to provide a variety of textures.
Lighting also plays a role; serving the cake under dim lights or candlelight makes the “haunted” theme feel more immersive for your guests.
Storage and Leftovers |
Refrigerating
Store the cake in an airtight container in the refrigerator for up to 5 days. Keep it away from strong-smelling foods to prevent the butter in the frosting from absorbing odors.
Reheating
This cake is best served chilled or at room temperature. If refrigerated, let a slice sit at room temperature for 30 minutes to allow the buttercream to soften. Do not microwave the cake as it will melt the frosting.
Freezing
You can freeze the unfrosted cake layers for up to 3 months. Wrap each layer tightly in plastic wrap and foil; thaw in the fridge overnight before frosting.
Frequently Asked Questions |
- ●Q: How do I stop my cake layers from sliding?A: Use a small dab of buttercream on the cake board before placing the first layer, and use a toothpick or a plastic cake dowel through the center of the tiers to lock them together securely.
- ●Q: Can I make this cake without a stand mixer?A: Yes, you can use a hand mixer or even a whisk and bowl, though it requires more elbow grease. Ensure you beat the butter and sugar until very pale and fluffy to maintain the cake’s lift.
- ●Q: What is the best way to get a gray frosting color?A: Start with a white buttercream and add a tiny amount of black gel food coloring using a toothpick. Stir slowly and test the color frequently, as black dye is very concentrated and can darken quickly.
- ●Q: My frosting is too soft to pipe the house details; what should I do?A: Place the frosting bowl in the refrigerator for 10 to 15 minutes. If it is still too soft, beat in a tablespoon of powdered sugar to thicken the consistency until it holds a firm peak.
- ●Q: Can I use a different type of sprinkle?A: Any sprinkle will work, but a mix of shapes like stars, bats, and orange pearls adds more visual interest. Avoid oversized candies that are too heavy, as they may pull away from the frosting.
Why This Recipe Belongs in Your Weekly Rotation |
While a haunted house cake is a seasonal specialty, the core chocolate cake and buttercream recipes are versatile staples. Mastering these bases allows you to create countless other desserts throughout the year.
Baking themed cakes encourages creativity in the kitchen and provides a way to celebrate small milestones or holidays with family. It turns a standard dessert into a memorable event.
The combination of rich chocolate and customizable frosting ensures that this recipe will be a hit every time it appears on the table. It is a reliable way to bring joy and a bit of spookiness to your home.
Final Thoughts |
This Haunted House Cake blends a deep, cocoa-rich sponge with a playful, eerie design. intentional imperfections and festive sprinkles, you can create a professional-looking dessert without the stress of perfect precision.
Making this cake is a great way to engage with the Halloween season and create a centerpiece that guests will remember. It balances taste and theme perfectly, making it a win for both the baker and the eater.
Gather your ingredients and start building your own spooky edible manor today!
Haunted House Cake with Halloween Sprinkles
- Total Time: 1 hour 20 minutes
- Yield: 12 servings 1x
Description
A tiered chocolate cake designed to look like a spooky haunted house, decorated with eerie frosting and colorful Halloween sprinkles.
Ingredients
- 2 cups all-purpose flour
- 3/4 cup unsweetened cocoa powder
- 2 cups granulated sugar
- 1.5 tsp baking powder
- 1.5 tsp baking soda
- 1 tsp salt
- 2 large eggs
- 1 cup buttermilk
- 1/2 cup vegetable oil
- 2 tsp vanilla extract
- 1 cup unsalted butter, softened
- 4 cups powdered sugar
- 1/4 cup heavy cream
- 1/2 tsp vanilla extract
- Black gel food coloring
- 1/2 cup Halloween-themed sprinkles
Instructions
- Preheat oven to 350F (175C) and grease three round cake pans of varying sizes (e.g., 8-inch, 6-inch, and 4-inch).
- Whisk together flour, cocoa powder, sugar, baking powder, baking soda, and salt in a large bowl.
- Add eggs, buttermilk, oil, and vanilla extract to the dry ingredients. Beat on medium speed for 2 minutes until smooth.
- Divide the batter evenly among the pans and bake for 30-35 minutes or until a toothpick comes out clean.
- Cool cakes in pans for 10 minutes, then transfer to wire racks to cool completely.
- Beat softened butter until creamy, then gradually add powdered sugar, heavy cream, and vanilla until fluffy.
- Divide the frosting into two bowls. Leave one white and add a tiny amount of black gel coloring to the other to create gray.
- Stack the cakes from largest to smallest, spreading a layer of frosting between each tier.
- Apply a thin crumb coat of frosting to the exterior and chill for 20 minutes.
- Apply the remaining gray frosting in jagged, uneven layers to create the haunted house effect.
- Press Halloween sprinkles into the sides and top of the cake before the frosting sets.
- Pipe a small door and windows using the white frosting for final details.
- Prep Time: 45 minutes
- Cook Time: 35 minutes
- Category: Dessert
- Method: Baking
- Cuisine: American