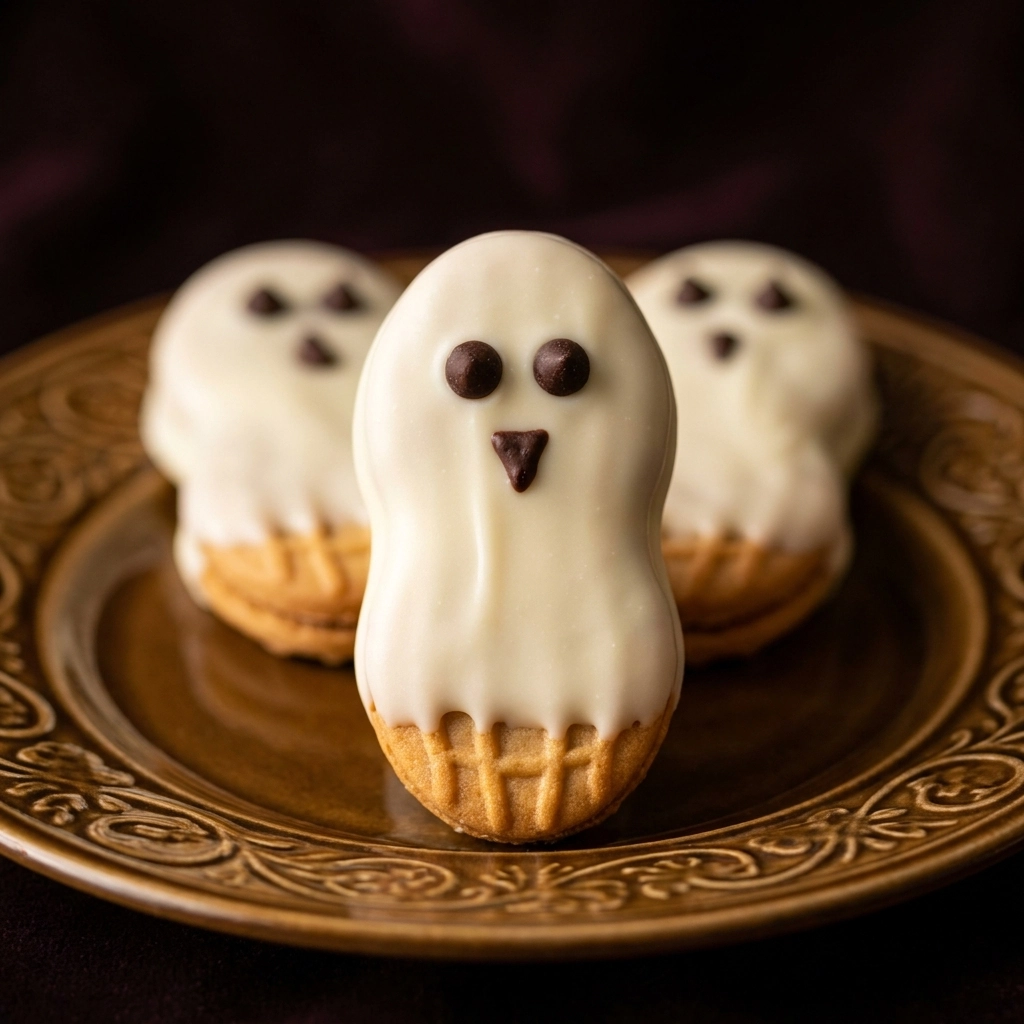
Picture a tray of store-bought cookies that look like ghosts but taste like cardboard. They are bland, waxy, and utterly forgettable. Now, imagine a homemade treat that snaps with peanut butter richness and melts with creamy white chocolate.
These little ghosts transform a classic cookie into a spooky masterpiece. They are whimsical, sweet, and incredibly simple to assemble.
Parents love them because there is no oven involved. Kids love them because they get to paint faces on dessert.
The magic lies in the contrast between the salty peanut butter and the sugary coating. It creates a flavor profile that is far superior to any pre-packaged novelty sweet.
Every party needs a standout snack that looks impressive but takes minutes to make. These ghosts fit that bill perfectly.
A few early attempts at this were a disaster. I almost gave up on this recipe until I realized that melting the chocolate too hot caused it to separate and clump.
Once the temperature was mastered, the ghosts became flawless. Let us dive into the details. Spooktacular Halloween Popcorn Recipe For Fun Treats Easy Halloween Snack Mix
- ●Why You’ll Love This Recipe
- ●A Brief Background / Why This Recipe Works
- ●Perfect For Spooky Parties and Family Fun
- ●Main Ingredient Spotlight: Nutter Butters
- ●Secondary Ingredient Spotlight: White Chocolate
- ●Key Ingredients
- ●How to Make It
- ●Pro Tips
- ●Delicious Variations
- ●Best Ways to Serve
- ●Storage and Leftovers
- ●Frequently Asked Questions
- ●Why This Recipe Belongs in Your Weekly Rotation
- ●Final Thoughts
There is something deeply satisfying about a treat that looks professional but requires zero actual baking. These ghosts bring a playful energy to any autumn gathering.
- ●Only three main ingredients are needed.
- ●No oven is required, making it safe for toddlers.
- ●The prep time is incredibly short.
- ●They look adorable on a platter.
- ●Peanut butter and white chocolate are a timeless pair.
- ●Customizable faces allow for creative expression.
- ●They hold their shape well during transport.
- ●Budget-friendly materials make it accessible.
- ●Fast cleanup since there are no mixing bowls.
- ●Perfect for gifting to teachers or classmates.
It is a low-stress way to bring a lot of joy to the table. If you want something even more indulgent, try Fudgy Peanut Butter Brownies The Ultimate Decadent Treat
A Brief Background / Why This Recipe Works |
The success of this treat relies on the structural integrity of the Nutter Butter cookie. These cookies are dense and sturdy. They act as the perfect anchor for the chocolate coating without crumbling under the weight.
White chocolate provides the ghostly hue and a sweet, creamy finish. Because white chocolate has a higher fat content, it clings to the cookie’s ridges, creating a thick, opaque shell that mimics a floating spirit.
The salt in the peanut butter cuts through the sugar of the chocolate. This balance ensures that the treat tastes sophisticated rather than just cloyingly sweet.
Perfect For Spooky Parties and Family Fun |
These treats are ideal for busy weeknights when you need a last-minute snack for a school function. Since there is no baking, you can whip them up while the kids do their homework.
Meal prep is also easy here. You can dip the cookies in a large batch and let them set in the fridge overnight. This saves you from kitchen chaos on the actual holiday.
Family dinners during October become more festive with a small plate of these ghosts as a dessert course. They spark conversation and laughter among all ages.
Holidays are the peak season for this recipe. They fit perfectly into a Halloween spread alongside pumpkins and cobwebs. For a different kind of treat, consider Biscoff Cookie Butter Brownies The Ultimate Speculoos Treat Best Biscoff Dessert
Main Ingredient Spotlight: Nutter Butters |
Nutter Butter cookies provide the essential crunch and flavor base. Their unique peanut butter filling offers a savory depth that anchors the entire dessert. The cookie’s shape is naturally oblong, which perfectly mimics the silhouette of a ghost.
Without the cookie, you lose the structural support and the salty contrast. Using a generic peanut butter cookie often results in a texture that is too soft, causing the ghosts to slump or break during the dipping process.
Secondary Ingredient Spotlight: White Chocolate |
White chocolate acts as the canvas for the ghostly appearance. It provides a smooth, velvety texture that seals the cookie and keeps it fresh. High-quality brands with real cocoa butter provide a better snap and a cleaner melt.
If you substitute this with white candy melts, you might find the taste a bit more artificial. However, melts are often easier to work with for beginners who struggle with chocolate tempering. Either way, the bright white color is non-negotiable for the spooky aesthetic.
Key Ingredients |
Gather these items to begin your ghostly creation. Ensure everything is at room temperature for the best results.
- ●Nutter Butter Cookies — The crunchy, peanut-butter-filled foundation.
- ●White Chocolate — High-quality chips or bars for the ghostly coating.
- ●Chocolate Sprinkles — Small black or dark brown beads for the eyes.
- ●Chocolate Ganache or Melted Chocolate — For drawing a tiny, spooky mouth.
 How to Make It |
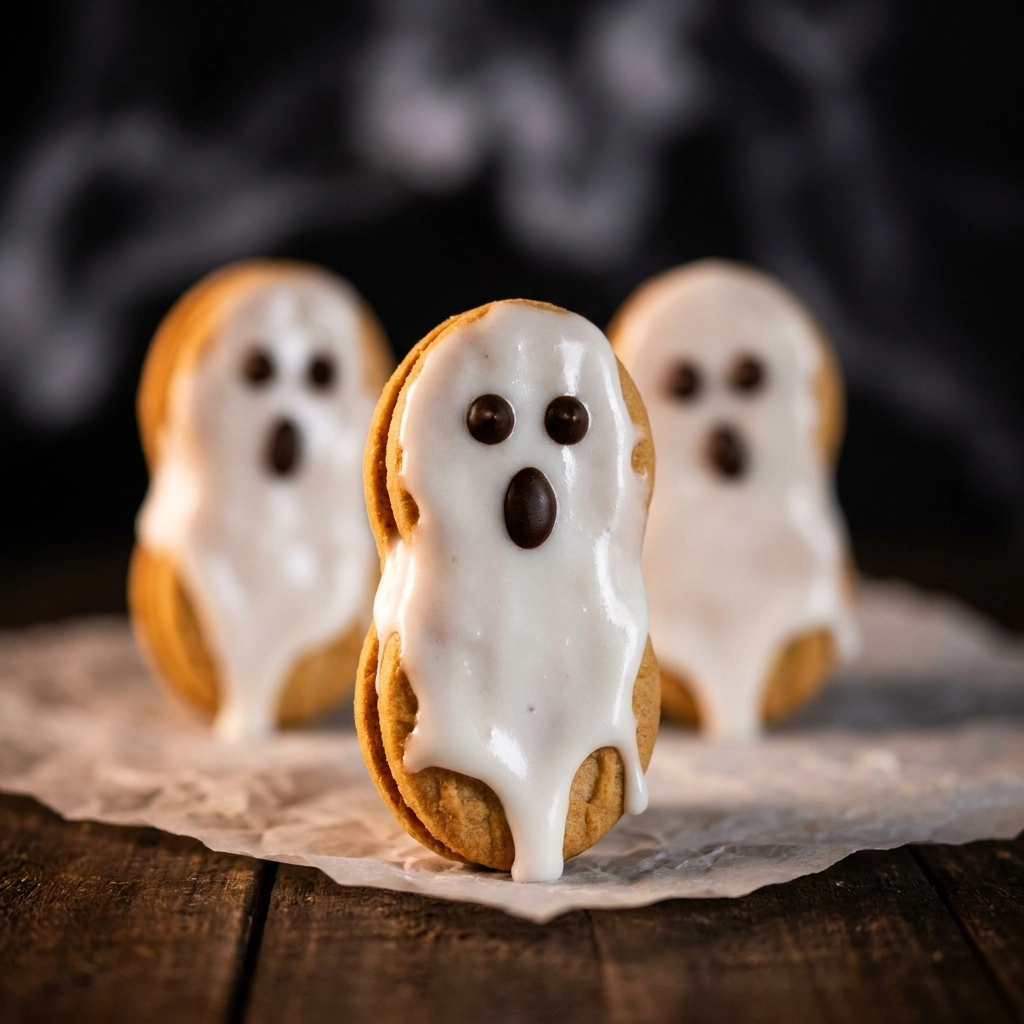
Follow these steps carefully to ensure your ghosts look hauntingly beautiful. Precision in the melting phase is the key to success.
- Prep the workspace: Line a baking sheet with parchment paper. This prevents the chocolate from sticking to the pan and allows for an easy peel-off once the treats are set.
- Melt the chocolate: Use a microwave-safe bowl and heat the white chocolate in 30-second bursts. Stirring frequently is vital because white chocolate burns easily, and a burnt batch will lose its pristine white color.
- Smooth the texture: Stir the chocolate until it is completely glossy and smooth. If it looks grainy, add a tiny drop of coconut oil to help it emulsify.
- Dip the cookies: Hold each cookie and plunge it into the melted chocolate. Leave a small gap at the bottom so the ghost looks like it is floating.
- Remove excess: Gently shake the cookie or lift it and let the excess chocolate drip off. Over-coating creates a blob; a thin, even layer creates a sleek ghost.
- Set the treats: Place the cookies on the parchment-lined sheet. Let them cool in the refrigerator for about 10 minutes to ensure the shells are hard.
- Decorate the faces: Use a toothpick or a small piping bag to add the eyes and mouth. Do this last so the decorations do not smudge or melt into the base coating. Pumpkin Peanut Butter No Bake Cookies The Ultimate Autumn Treat Fall Dessert Ideas
1A few small adjustments can make a huge difference in the final look. Keep these secrets in mind while you work.
- ●2Avoid Overheating: Never let the chocolate boil. If it gets too hot, it will seize and become chunky.
- ●3Use a Fork: A fork helps you lift the cookie while letting the excess chocolate drain away efficiently.
- ●4Cool the Cookies: Keep the cookies at room temperature. Cold cookies can cause the chocolate to set too quickly, leaving lumps.
- ●5Precision Decorating: Use a toothpick dipped in melted chocolate for the mouth. It gives you way more control than a spoon.
- ●6Parchment is Key: Never use a bare pan. The chocolate will bond to the metal and ruin your ghosts.
Delicious Variations |
While the classic version is great, you can tweak the flavors to suit your mood. Experiment with these ideas for a unique twist.
- ●Dark Magic: Use dark chocolate for the coating to make “Zombie Cookies.”
- ●Colorful Spirits: Add a drop of food coloring to the white chocolate for neon ghosts.
- ●Nut-Free Alternative: Swap Nutter Butters for vanilla wafers or shortbread.
- ●Autumn Spice: Sprinkle a pinch of cinnamon on the wet chocolate for a warm flavor.
- ●Extra Crunch: Press crushed pretzels into the chocolate before it sets.
Each variation brings a new dimension to the platter. If you enjoy colorful treats, check out 4Th Of July Pretzel Rods Easy Red White Blue Treats
Best Ways to Serve |
Presentation is everything when it comes to Halloween. These ghosts deserve a stage that enhances their spooky charm.
- ●Arrange them on a black platter for a high-contrast, dramatic look.
- ●Place them in a glass jar with orange tissue paper at the bottom.
- ●Scatter them around a centerpiece of mini pumpkins and faux spider webs.
- ●Serve them alongside a bowl of apple cider or a warm pumpkin latte.
Creating a thematic display makes the dessert feel like a planned event. It turns a simple cookie into a focal point of the party.
For a more sophisticatedfruit-based dessert to round out the meal, try The Ultimate Brown Butter Blackberry Peach Crisp Easy Summer Fruit Dessert
Storage and Leftovers |
Refrigerating
Keep the ghosts in an airtight container in the fridge for up to 7 days. This maintains the snap of the chocolate and prevents the cookies from softening.
Reheating
Do not reheat these treats. Heating will melt the chocolate coating and destroy the ghostly faces instantly.
Freezing
Freeze them for up to 2 months. Store them in a freezer-safe bag to prevent odor absorption from other frozen foods.
Frequently Asked Questions |
- ●Q: Why did my white chocolate separate and look oily?A: This usually happens because the chocolate was overheated. White chocolate is very sensitive to temperature; if it gets too hot, the cocoa butter separates from the solids. To fix this, try adding a tiny bit of vegetable oil or coconut oil and stirring vigorously.
- ●Q: Can I use a different cookie if I have a peanut allergy?A: Yes, you can absolutely use vanilla wafers, almond flour cookies, or even shortbread. The main goal is to find a cookie with a similar sturdy shape and a flavor that complements white chocolate. Just ensure the substitute is nut-free for your guests.
- ●Q: How do I stop the chocolate from tasting too sweet?A: White chocolate is naturally very sweet, but you can balance it by adding a tiny pinch of fine sea salt to the melted chocolate. This enhances the flavor and prevents the sweetness from becoming overwhelming. The salt also complements the peanut butter base perfectly.
- ●Q: My chocolate is too thick to dip the cookies. What should I do?A: If the chocolate is too viscous, it will create a thick, clumpy layer on the cookie. Add a teaspoon of coconut oil or cocoa butter to the mixture and stir it in. This thins the consistency while keeping the glossy finish intact.
- ●Q: What is the best way to make the faces stay on?A: Ensure the white chocolate base is completely set and cold before adding the decorations. If the base is still soft, the eyes and mouth will bleed into the white chocolate. Using a piping bag with a very small tip also provides the most precision.
- ●Q: Do these cookies need to be chilled before dipping?A: No, it is actually better to use them at room temperature. If the cookies are too cold, the white chocolate will harden almost instantly upon contact. This leads to uneven coating and lumps that are difficult to smooth out.
Why This Recipe Belongs in Your Weekly Rotation |
While it is a holiday treat, the simplicity of this recipe makes it a great activity for any rainy afternoon. It teaches children how to follow steps and encourages creative artistry through food.
The combination of textures is universally loved. It satisfies the craving for something sweet and salty without requiring a trip to a bakery or hours of labor.
Adding a small batch of these to your routine during autumn brings a sense of seasonal joy to the household. It is a low-stakes way to celebrate the magic of the season.
Final Thoughts |
These Nutter Butter Ghosts are a brilliant marriage of simplicity and style. basic ingredients, you create a visually stunning treat that tastes far better than any store-bought option.
Whether you are hosting a massive bash or just want a cozy snack with the kids, this recipe delivers. It is fast, foolproof, and guaranteed to put a smile on everyone’s face.
Grab your cookies and some chocolate, and start crafting your own haunted dessert platter today!
Spooky Nutter Butter Ghosts: Easy Halloween Treats
Description
Make adorable Nutter Butter Ghosts with this easy, 3-ingredient recipe. Perfect for kids and Halloween parties. Quick, no-bake, and deliciously spooky!
Ingredients
Instructions
- Category: Dinner Recipes: Easy & Satisfying Meals